Creating a Discord Bot from Scratch and Connecting to MongoDB
Create a functional scorekeeping bot for your discord server using python and store data in a MongoDB database.
![]()
Discord is a messaging platform that is incredibly friendly towards developers. A major outlet for discord developers is the production of discord bots which can perform an infinite number of tasks such as sending messages, playing music, and even allowing the ability to have mini-games in a chat server. In this tutorial, we will create a discord bot using Python that will track certain messages that users send and add a scoring system using MongoDB.

To begin, first, install the discord.py, dnspython, and pymongo, module in the terminal. Dnspython and pymongo will be used for our MongoDB connection.
Fo l lowing that, import all the modules that you just installed.
After this, we then have to activate our bot on the discord web app. To begin, head over to:
and click on the developer portal.
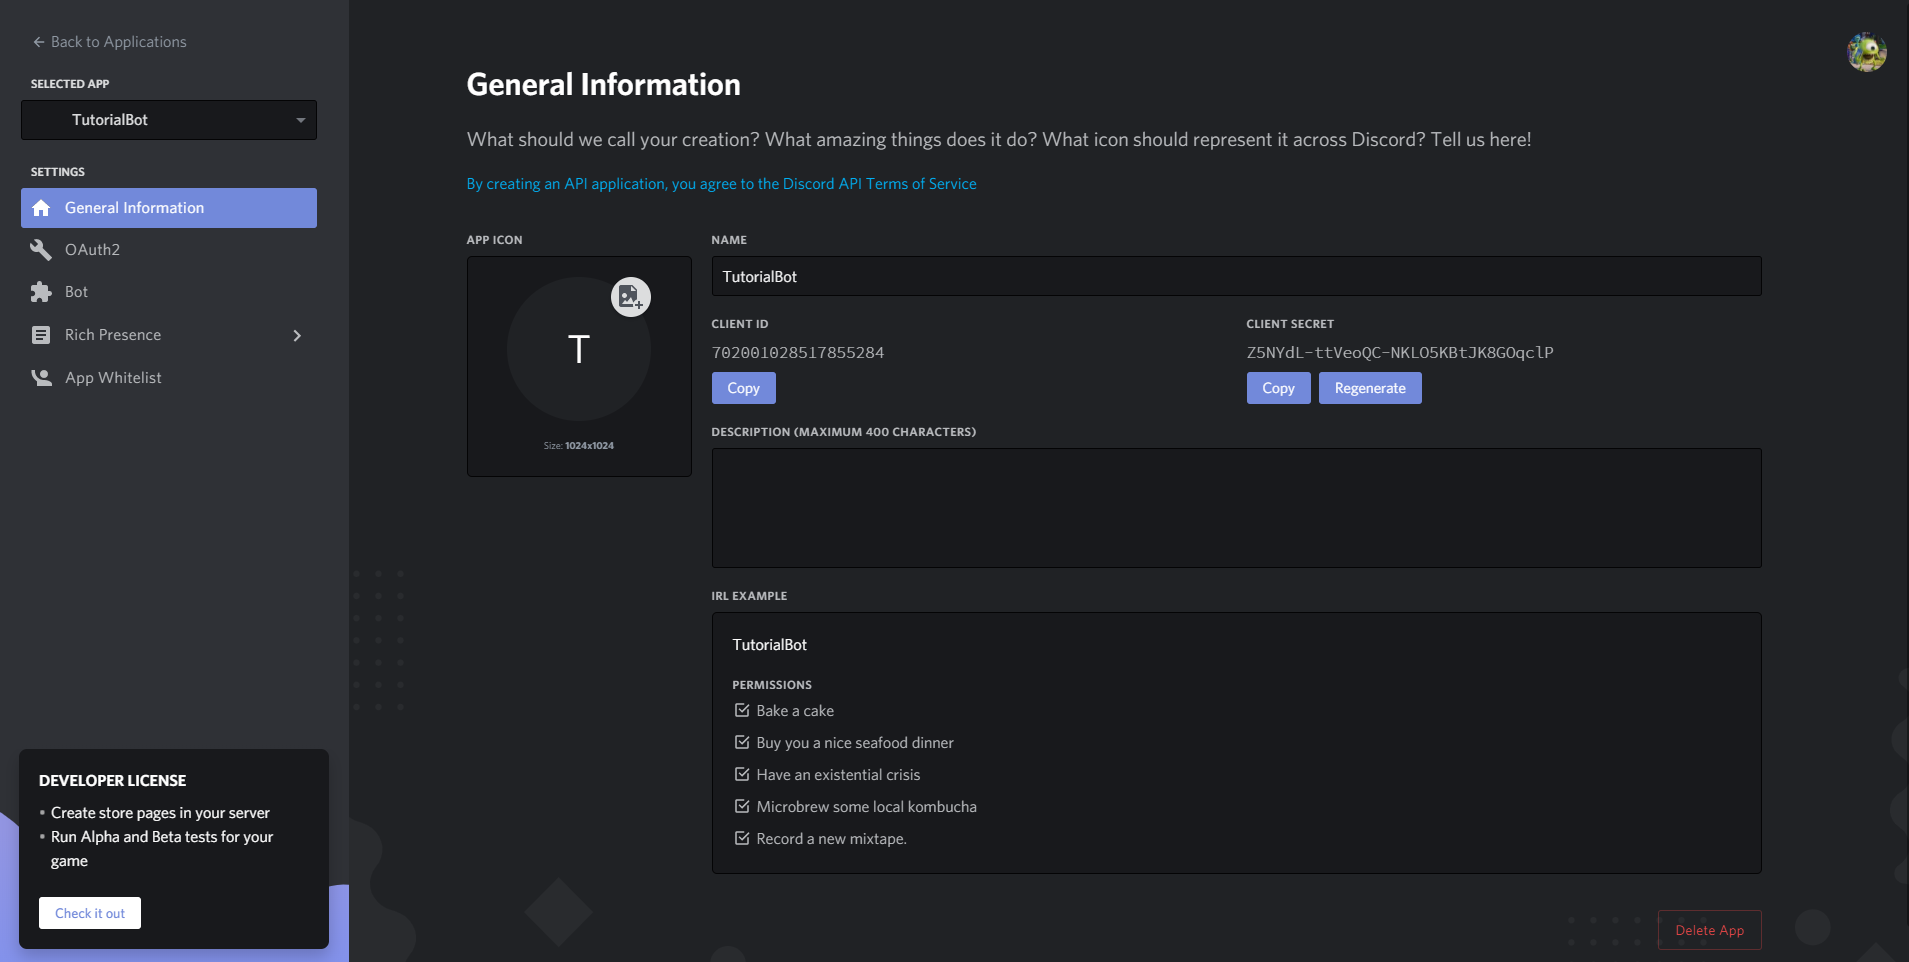
Once clicking on the Developer Portal, click on the blue button in the top right that says "New Application". Once you enter a name for your bot, you should see a screen like this:
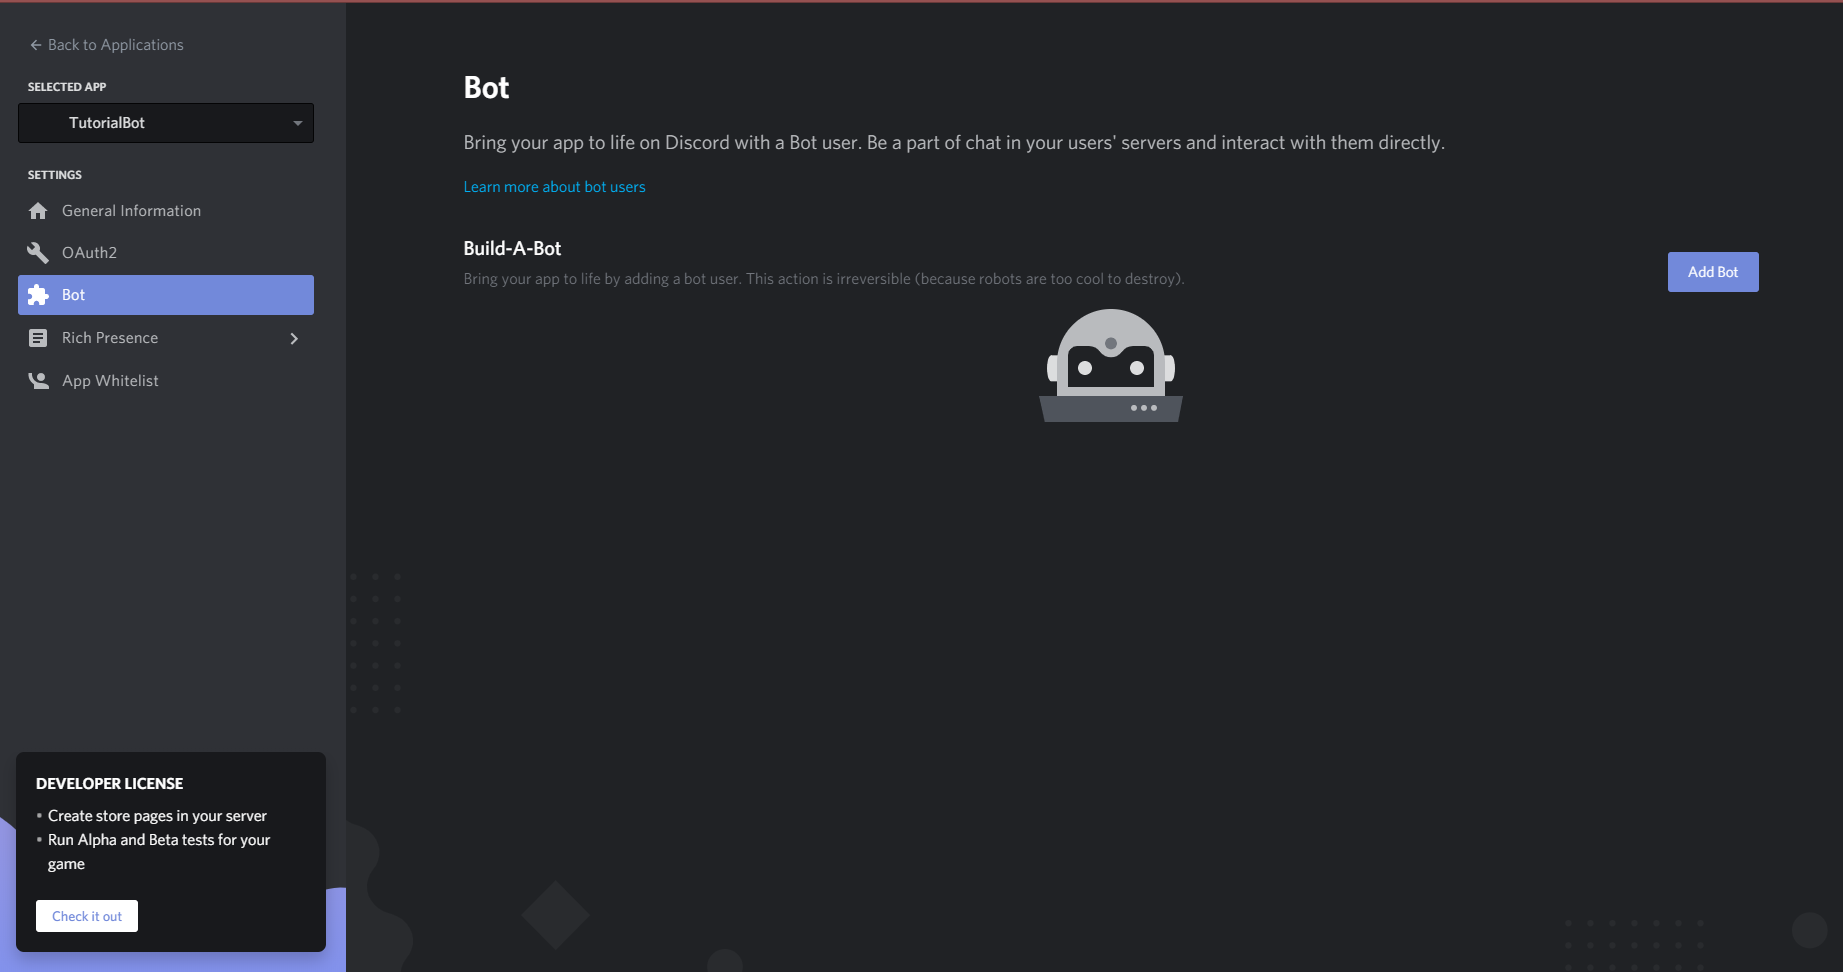
Next, go ahead and click on the tab on the right-hand side of the screen that says "Bot". You should see a screen like this:
After you reach this screen, click on the blue button on the right that says "Add Bot". You should see a screen like this:
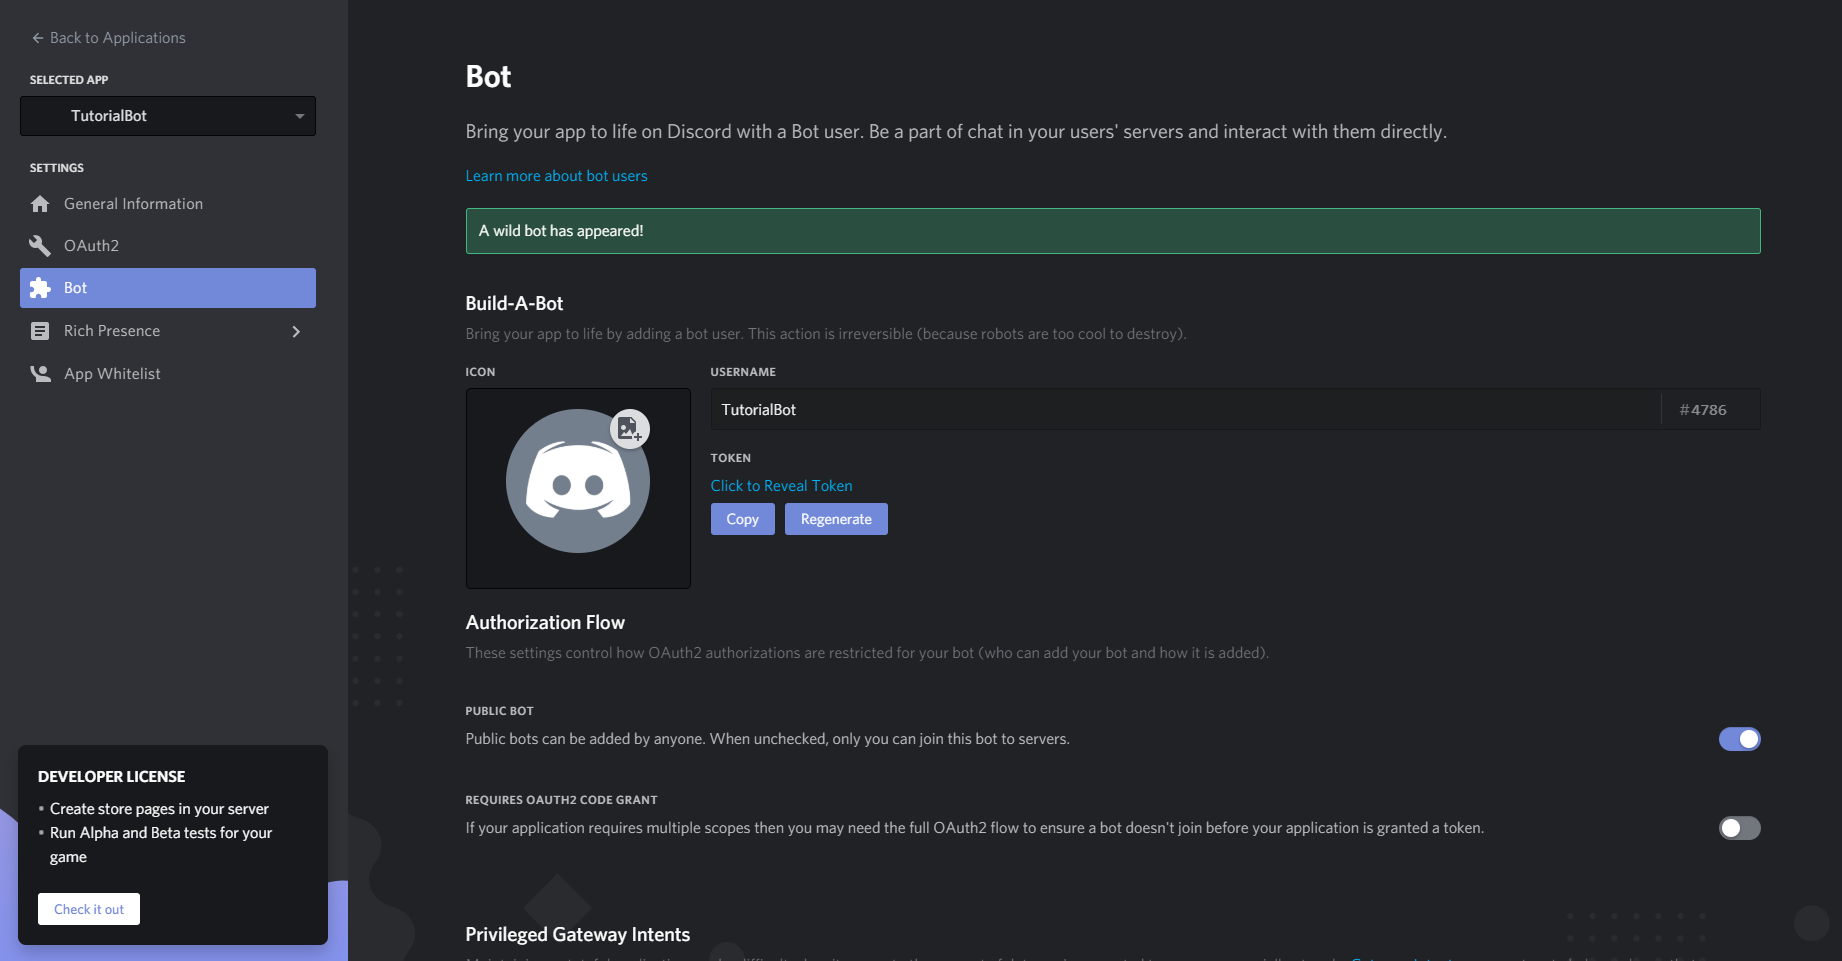
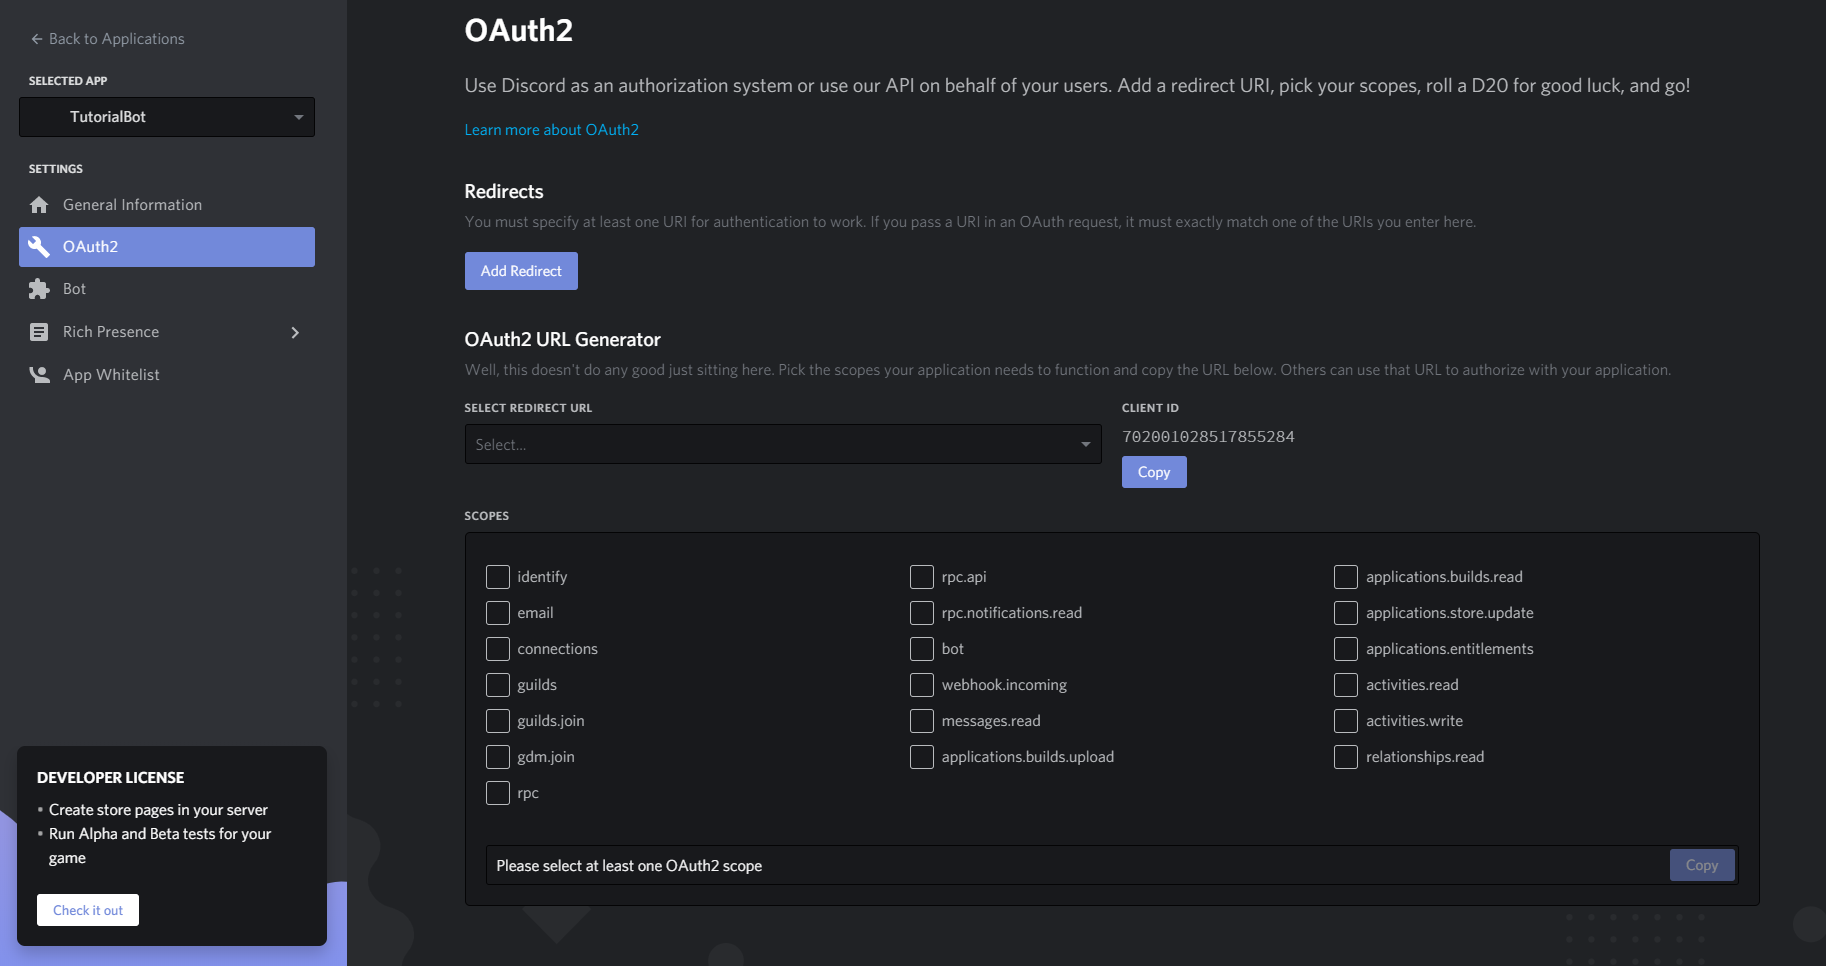
Here you will see all the information for your bot, including the Token which allows you to access the bot. Make sure that you keep this token safe because it is the one thing that determines who can access the bot and change its functionality. Next, we have to add the bot to a server. In this tutorial, there is a separate server that has been created for testing. To add the bot to a server, go ahead and click on the "OAuth2" tab on the left-hand side of the screen. This tool creates an access URL for your bot which then connects to the Discord "OAuth2 API". You should see a screen like this:
Once you reach this screen, select the box that says "bot". Once you click on the box, selectable permissions should show up on the screen. For this bot, you may select the box that says "Administrator" to allow for all permissions for the purpose of testing. However, when creating a bot that you want to add to a public server, you may not want to add all permissions.

Once all your options are selected, an URL will be autogenerated. Copy that URL to your clipboard and paste it into your browser. Once you are sent to that URL, select the server you wish to add the bot to. Congratulations you have now officially added your first bot to your server!

Now that we have added the bot to our server, we can begin programming! We have to first create a connection to the bot. This is what the token is used for.
In this code snippet, I saved the token for my bot in a separate text file and then stored that value in the variable "token". After this, I created a Client, which is the connection your bot has to Discord and its APIs. In the snippet, you can see that the client has its "on_ready()" function implemented. This function is called once the bot is ready for further action. Delving further into the on_ready() function, the keyword "async" represents that the function is asynchronous and happens along with any other function that is running. This will make more sense once the bot has more functionality implemented into it. Finally, we are running the client with the token that we have saved in our variable. If you run this snippet, you should get the name of your bot output on the screen followed by the remaining print statement.
Next, we must program the bot to read user messages and determine if there is a keyword that it will pick up for its leveling system. For this bot, I will be using the words "discord", "python", "code", and "lego". These keywords will not be case sensitive.
Here, we have created another event for our Client which implements the function "on_message()". This function simply runs when a user sends a message to a channel. It should print the basic information about the message sent such as its channel, author, the name of the author, and what the message is. Once the bot checks for a keyword such as "python", it will send to the channel that it was accepted. Here is the finished code snippet for sending and receiving messages:
Now that we have the basic functionality of sending and receiving messages, it is now time to log the user level in our MongoDB database! We are going to be calculating the user level simply by counting how many times a user has said a keyword.
First, we must create a MongoDB account at mongodb.com in order to create a cluster, AKA a group of databases. Once you have created an account, you will be prompted with this screen:
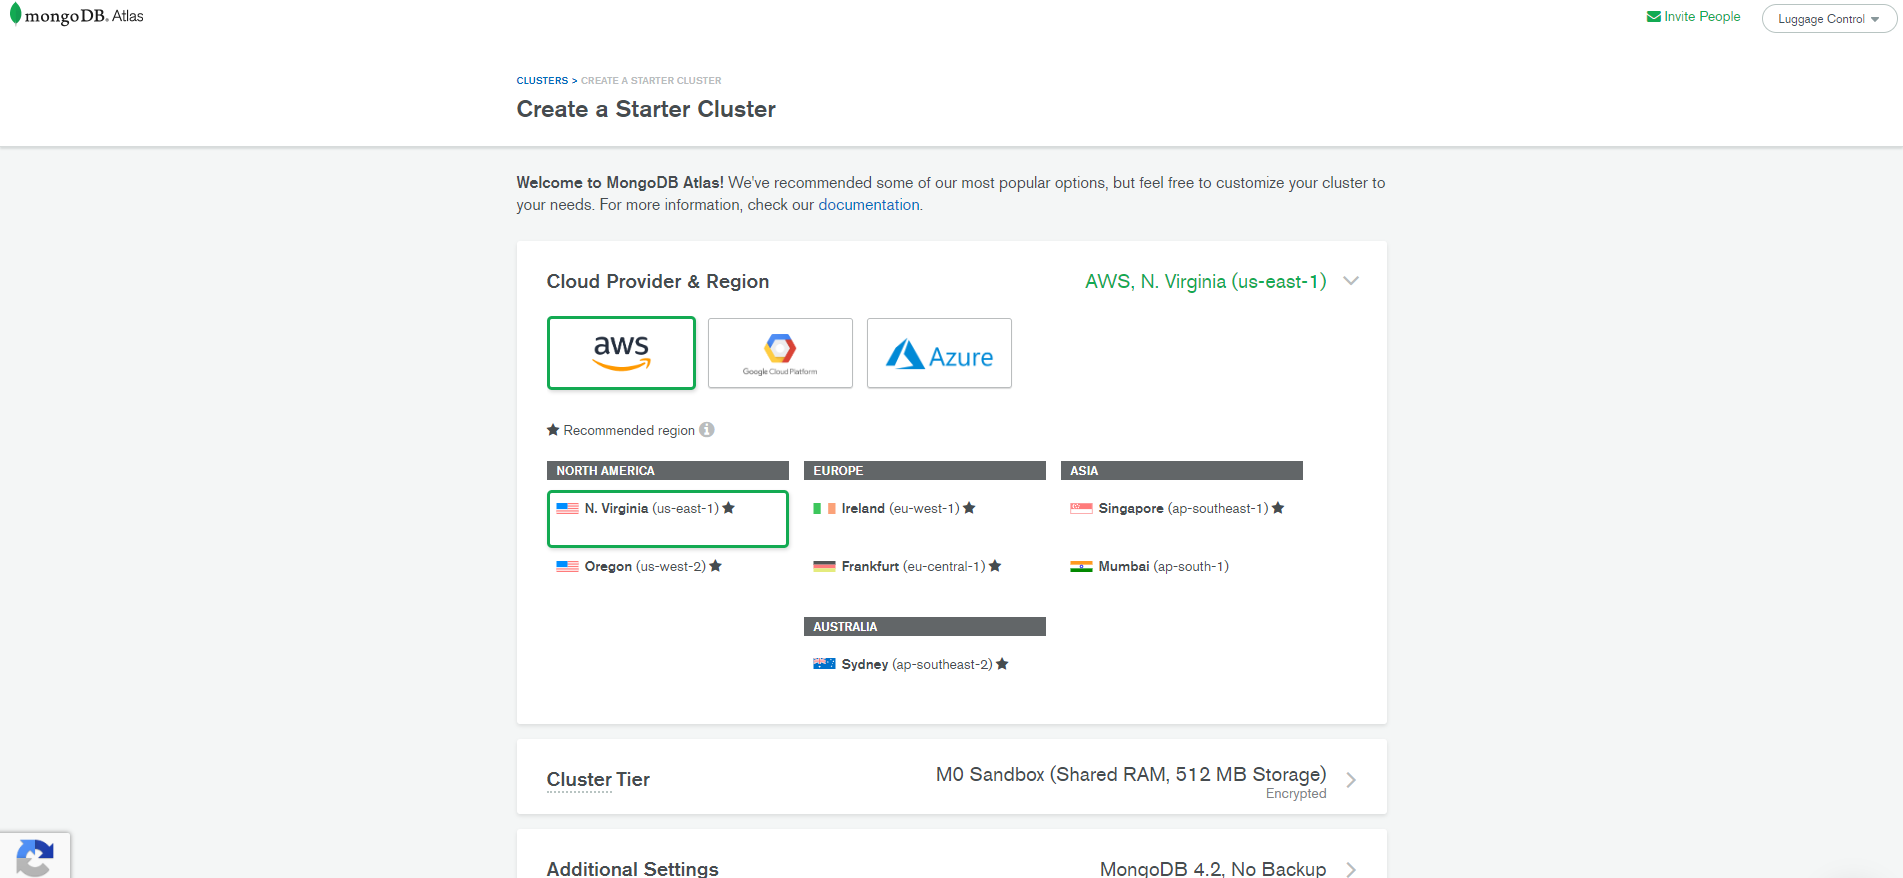
When creating a database, MongoDB stores your cluster in one of its physical databases so you must select your region and provider. Select whatever region you are closest located to ensure the fastest feedback time. If you wish, you may change the name of your cluster as well. Once you have created a cluster (which will take 1–3 minutes), you will see the following screen:

We must now connect to our cluster. To do so, click on the button that says "CONNECT". This will prompt you with this screen:
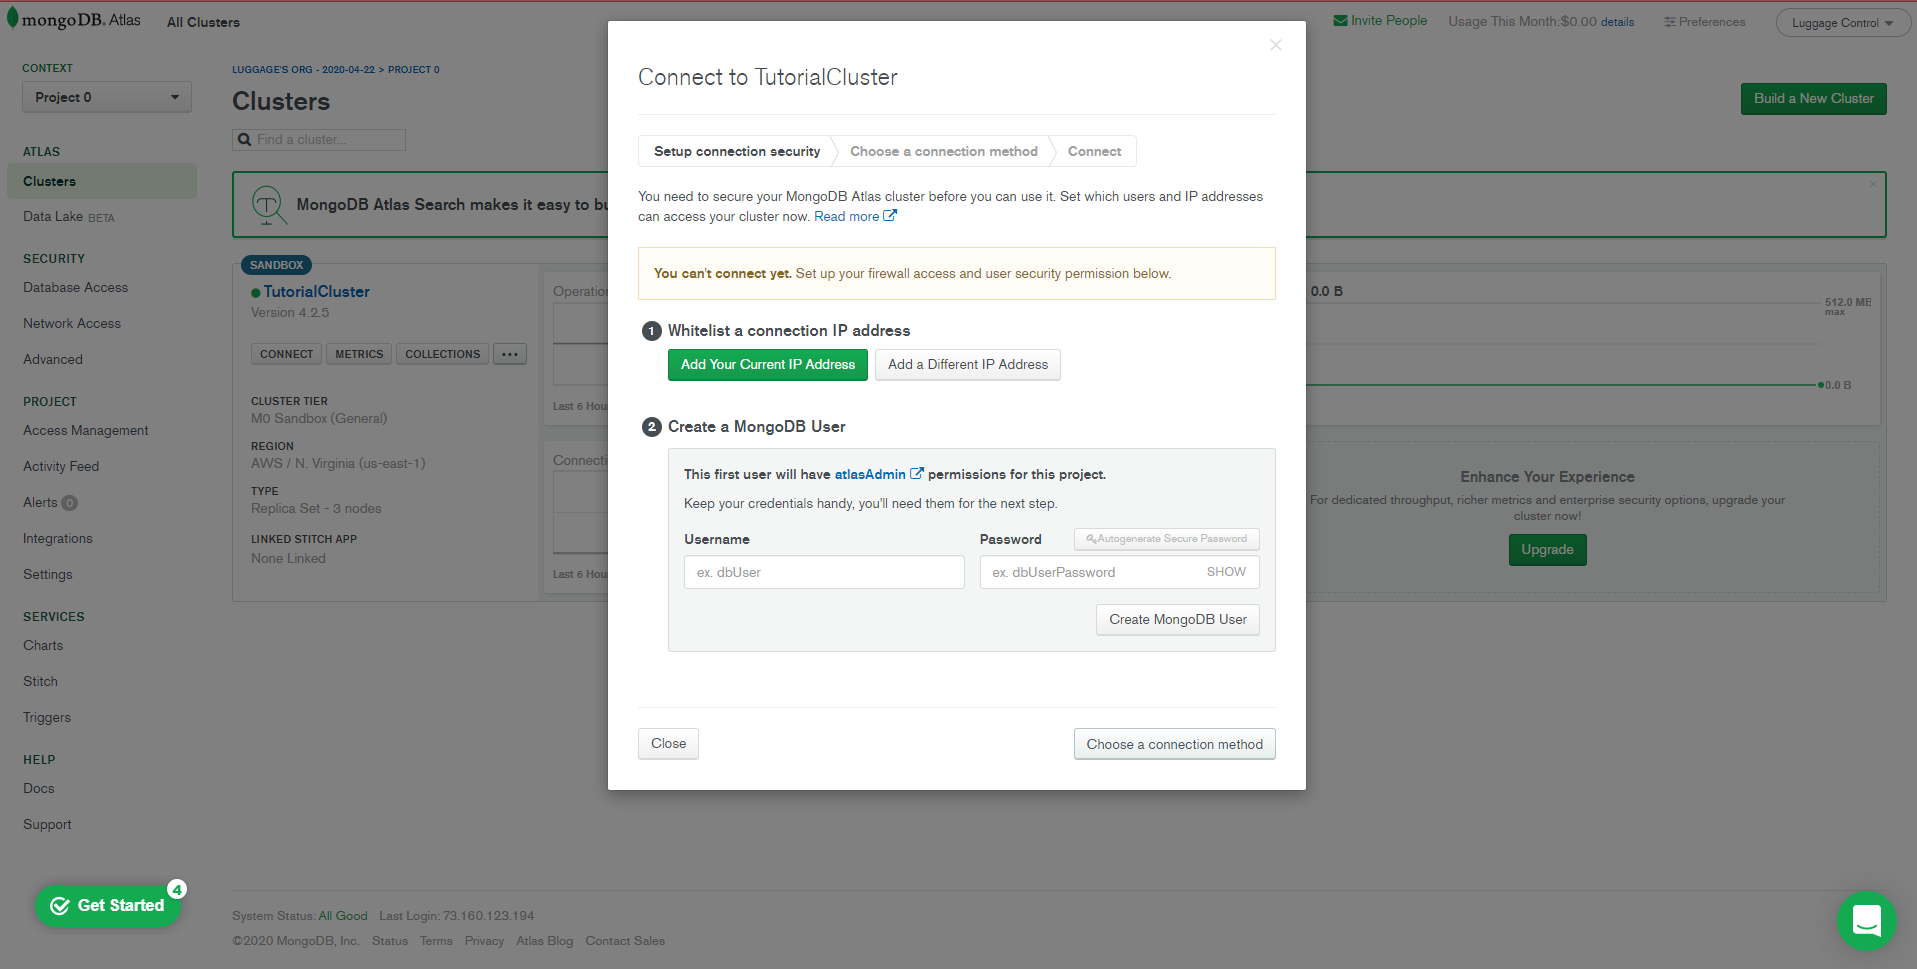
Simply click on the green button that says "Add Your Current IP Address". From there, create a user to link to the cluster. Make sure to remember your credentials for the user because it will be used for further steps. Once you complete that, move on to your connection method. This is the screen that will appear:

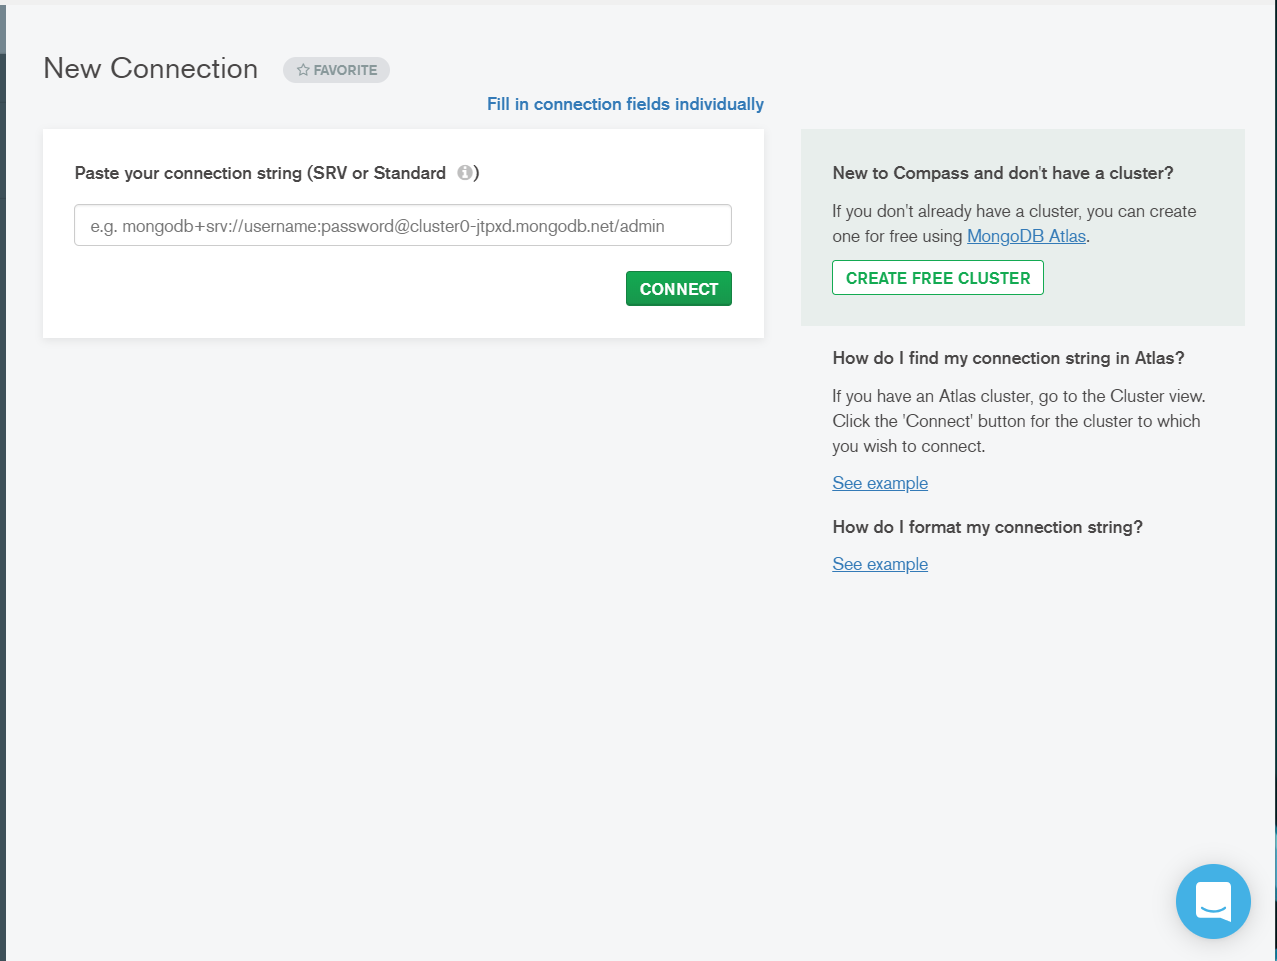
For this tutorial, we will be using MongoDB Compass which is MongoDB's GUI that allows for easy access to clusters and a good way to have analytics on your data. If you do not have MongoDB Compass, follow the instructions it provides for downloading the program. Once you download MongoDB Compass you will see a screen as such:
Going back to the MongoDB online, you will see a screen like this:

The URL that you are given is what you will copy and paste into your MongoDB Compass portal. In the URL, you will see that a part of it has "<password>". You will replace this with the password for your cluster user account. Once you paste this link into your MongoDB Compass portal, you will see your cluster!
Now, let's move back to the web portal for MongoDB and explore our cluster. Go ahead and click on the button that says "COLLECTIONS". A collection is a subgroup in your cluster where you can store your data. It will ask if you wish to load a sample dataset. Let's load it to get an idea of the structure of the cluster. It may take a few seconds to load.
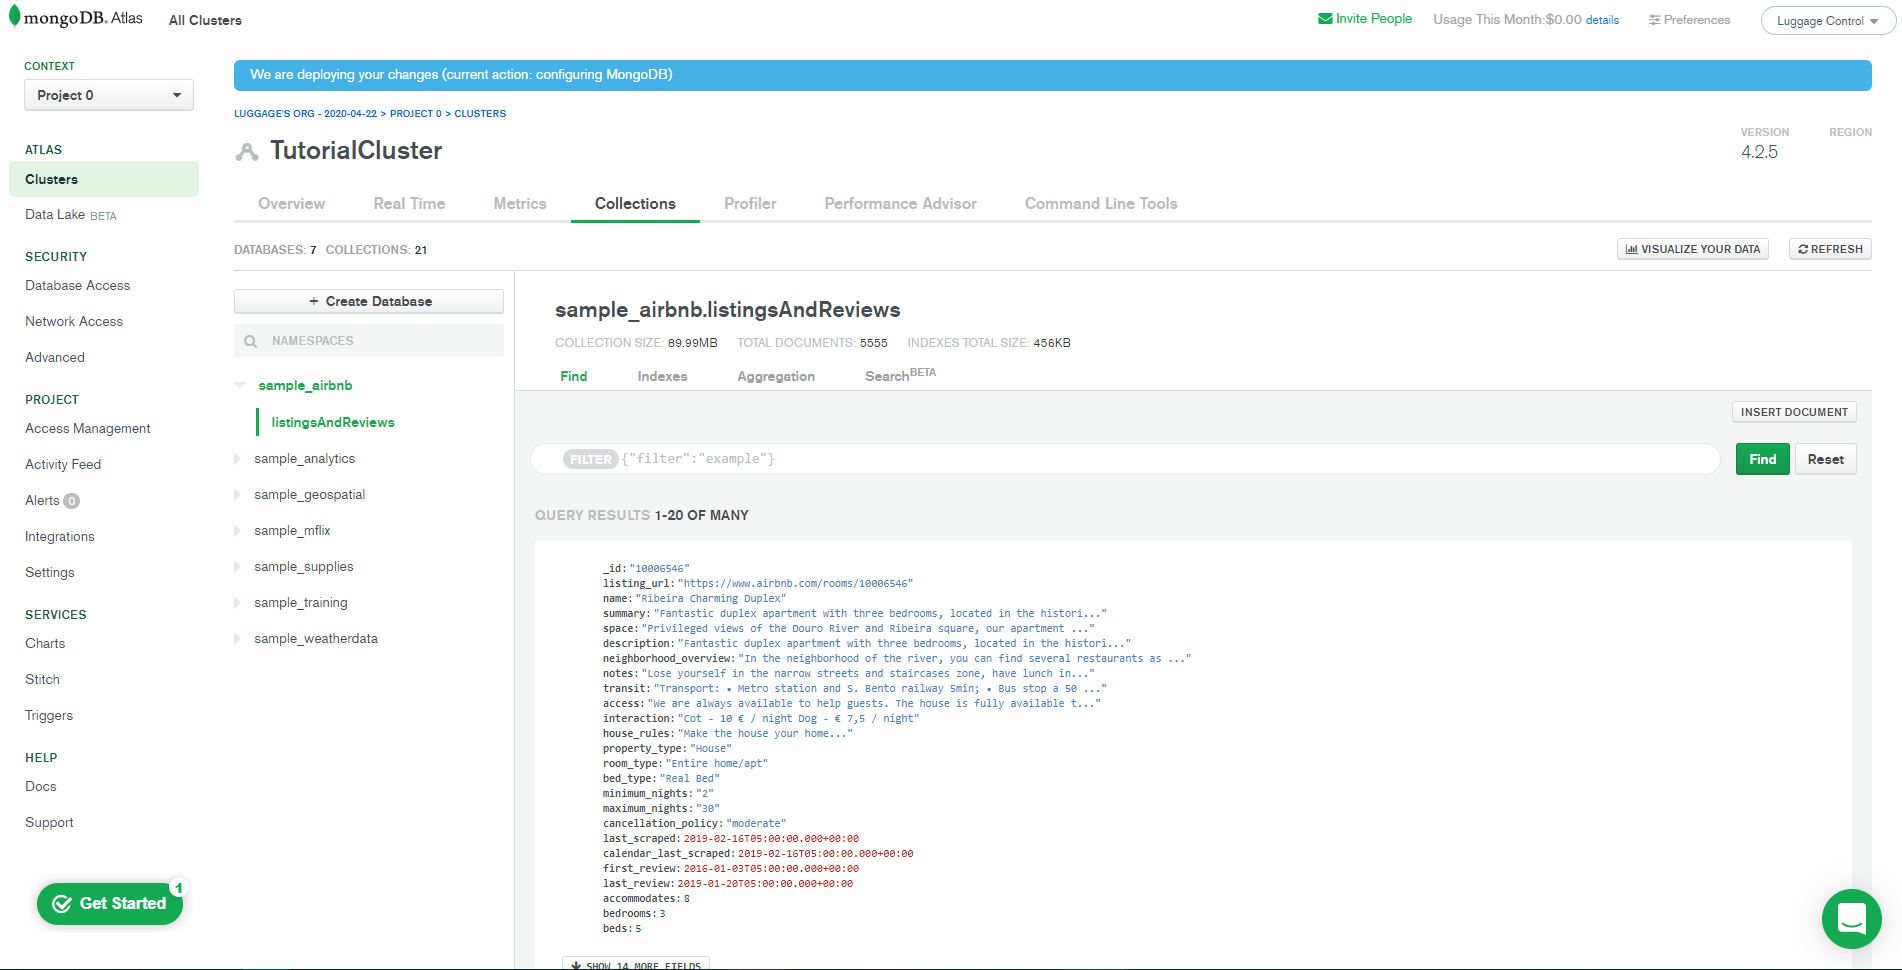
What we are going to do next is to create a database to store our user data for the bot. Click on the button that says "+ Create Database". Name the database whatever you wish. Data in MongoDB is stored in a hierarchy. It is structured as Cluster > Database > Collection. Once we create a database, we also need to create a collection that will be stored in the database.
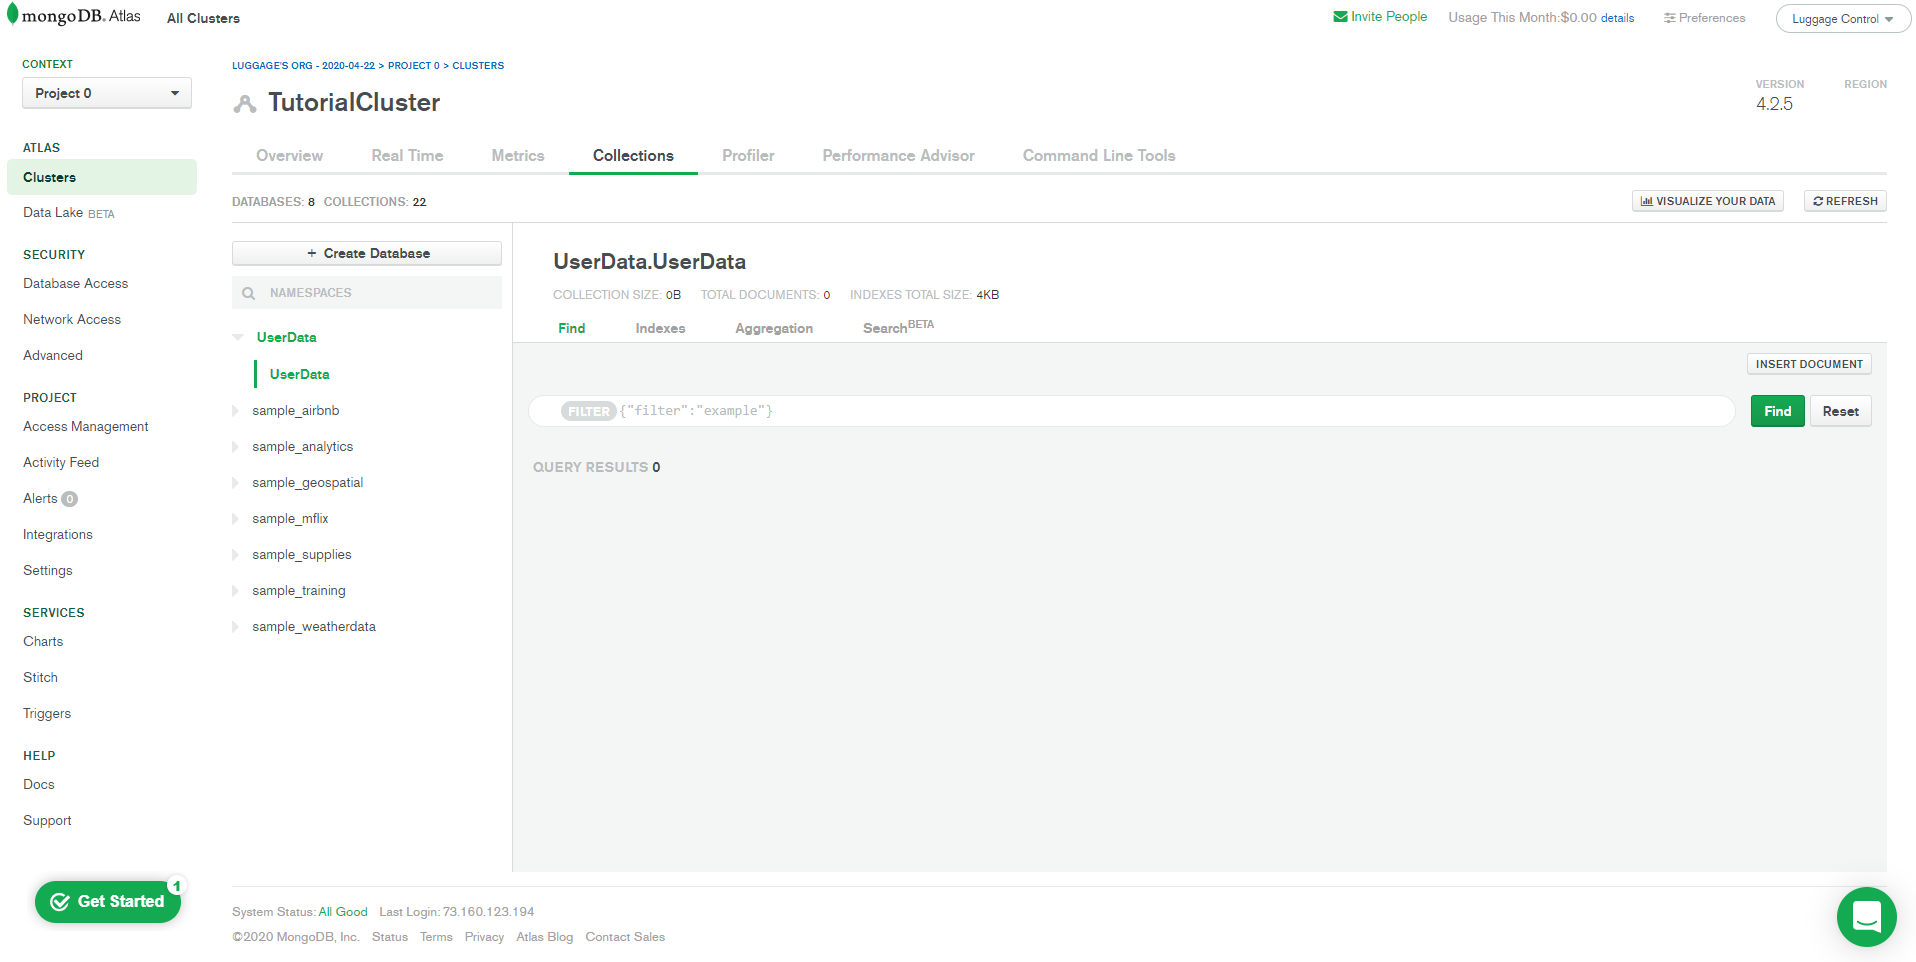
We now have an empty database waiting to be filled with our user data!
For retrieving and uploading data to our database, there are many functions created by MongoDB API and we will not completely cover all the functions that are used. If you wish to explore further here is the MongoDB documentation:
To begin, let's begin where we left off. We will be adding on to the current Discord Bot code that we have.
These are the imports that we will need to run our code. What we have to do next is connect to our cluster in our code and then navigate to where we store our data (User Data).
At first, we must connect to our cluster. Where it says "CONNECTION_URL" in the code, replace it with the URL that you used to connect to MongoDB Compass and surround it with quotation marks. The link is not shown in this tutorial because it contains a security breach. After that, we must connect to our database and then to our collection. We are now in the location that we need to be in!
What we have to do next is select attributes for each entry that is put into our database. Each entry would be considered one unique user which should include the username, their score, and their ID. Each entry in a MongoDB database is associated with a unique ID. You can either have it autogenerated for you, or you can decide it yourself. For our purposes, it will be best if we make the entry ID the user ID in Discord.
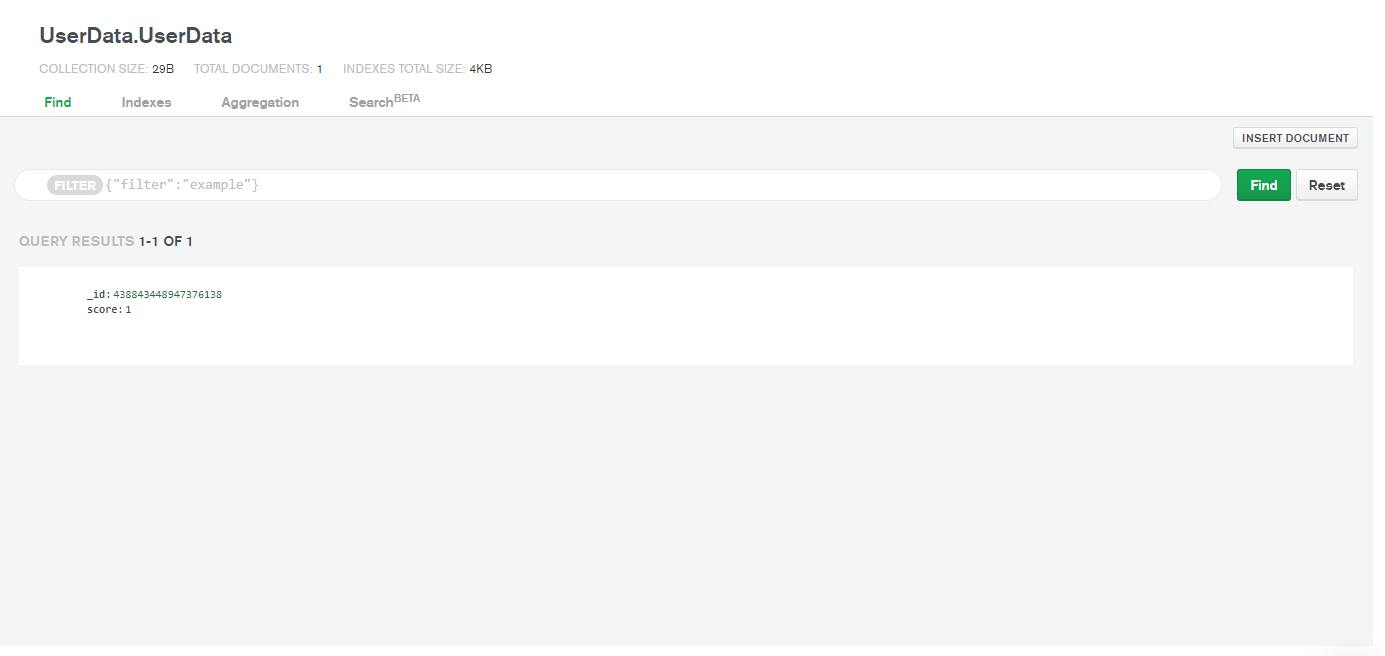
In this snippet, we created a variable named "post" which contains the attributes of our entry. We then insert those attributes into our "UserData" collection. Once we run the program and type in "python" in our Discord server, we will see our data stored in the database.
Add the code that sends data to our database to all other keywords that our bot is searching for. As of right now, the code will look like this:
However, there is a slight issue with the program that we have. Once we type in another keyword, the database cannot enter the same user again. We can fix this up with some simple conditional statements.
Here we created a query to our database and basically asked if there were any entries with a preexisting ID that is the same as the current one being entered. If the current ID that is being entered is different, then the new user is logged into the database. Next, we have to modify what will happen to a user if it already exists in the database.
In this code snippet, we are basically updating a preexisting entry if the user is already registered in the database. We first find the user with the .find() method and we then loop through the user and capture its "score" attribute. We then add one to that value. Finally, we use the .update_one() function to update the "score" attribute specifically. After adding this function to all keywords, you have a completed Discord bot linked to MongoDB! Here is the entire code:
Information and Image Sources:
pymongo.readthedocs.io
Source: https://towardsdatascience.com/creating-a-discord-bot-from-scratch-and-connecting-to-mongodb-828ad1c7c22e
Posted by: shoncordwelle0194781.blogspot.com
